Laid the first track
August, 2008
I need to begin using the railroad to move supplies around, so at long last, I've begun to lay the rail that I bought 7 years ago.
I have several hundred more feet on order, but I've found that ordering backyard RR supplies isn't like getting a book from Amazon.com... only after I place the order do they extrude (create) the rail, so it can take several weeks before I receive it :(
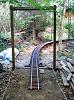
This first track is in the most convenient location for moving stuff between my truck and the RR. This section is entirely curved, and spans two bridges, so I started by laying the outer rail first, fastening it only every 8 feet or so, in order to find a smooth curve. Once I get the curve right I'll gauge the inner rail to the outer then add screws to all the remaining ties.
In addition to the rail, I also have a bunch of parts on order in order to build my first railcar (which I think will be a ballast hopper).
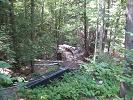
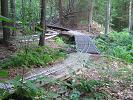
Across the Deck Truss bridge:
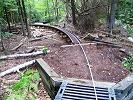
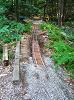
Across the "island" (I need to add ties!):
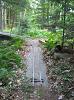
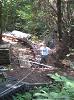
Across the Low Trestle:
The other end of the Low Trestle:

Note the ropes on the telltale! I tied 1/2" nuts on the rope ends for weight.
The outside rail across both bridges:
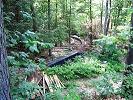
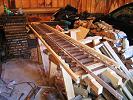
Before adding the 2nd rail I needed to make some ties.
Part of the used pressure-treated lumber I've gotten (for free) were deck railings. These were full of 27" long 2x2 balusters. Cutting them in half yields a pair of 13-1/2" ties... while I'd prefer to have 16" ties, I'm not gonna argue with free pressure-treated wood!
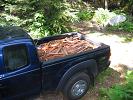
Here's a load of 750 ties in my truck:
Adding the 2nd rail:
There's hardly anything I'd rather be doing than work on the RR on a nice summer day:
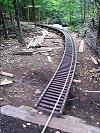
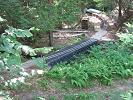
After adding the 2nd rail, I now have some official track:
After attaching the 2nd rail to the bridges, I added ties and ballast to the island:
I then extended the track downhill from the truss bridge:
I had one length of straight track (at the far end of the pic above), which I created as a panel with the track jig:
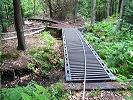
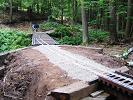
Here's the completed track crossing the deck truss bridge:
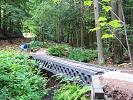
And looking back towards the trestle:
Here's a slideshow of the completed track, heading upgrade:
Same location, headed back downgrade:
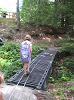
Bee crossing the bridge on her way home from school: