The Scytheville RR will have about 1700 of track. Like all railroads, every foot of that track must have ballast.
After experimenting with both 1/4" crushed stone and pea gravel, I've decided to go with the pea gravel. It fills the track better than the crushed stone, is easier to work with, and it looks better.
Of the initial 120 feet of track I laid, 80 feet of it was bridges - no ballast needed - and the remaining 40 feet were easily accessible by my pickup truck and wheelbarrow.
However, as I extend the track, I'm heading in directions not so easily accessible (and many that are decidedly inaccessible), thus I now need a better way to move ballast around.
The answer, of course: Use the railroad!
The bunker will be located along the woods road for easy filling (from my pickup, or perhaps a small dumptruck) and will have some sort of moveable extension to fill the ballast hopper.
I didn't create any plans - I had a rough idea in my head so I just started building.
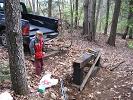
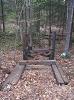
Here's the lower support. The bunker is located in a spot where (a) it's easily accessible by truck, (b) the truck can park on a slope (so gravity helps unload), and (c) where the track is level:
Jack is now old enough to help, and he's really great at bringing me tools.
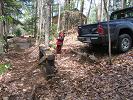
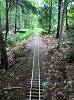
Here's the view down the trackline:
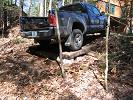
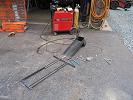
After some experimentation, I decided that I needed a simple ramp for the truck. This provides a guide when backing up plus levels the truck side-to-side:
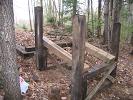
The skeleton of the thing:
Bonus: Today (May 9th, 2009) is National Train Day! I celebrated by working on the train :)
Truck's eye view of the skeleton and ramp. I installed a crosspiece on the ramp which stops the tires at the correct location:
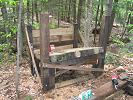
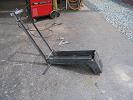
Bottom and front installed. I used 6x8s for the bottom because (a) a yard of ballast weighs nearly a ton, and (b) I have a zillion of them. The face (and sides) are 2x10s:
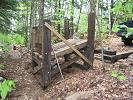
Looking up the trackline. The bunker has lots of cross-bracing because it would be a HUGE mess if this thing fell over :)
Sides installed:
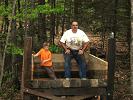
Me & Jack in the nearly completed structure. I look like some crazed backwoods axe murder :)
The "moveable extension" evolved into a chute that could be lowered into place plus a gate for allowing ballast into the chute.
The contraption is made of two pieces: a frame that bolts to the bunker and a chute that channels the ballast. The two pieces are joined with a simple homemade hinge. The chute is 8" wide with 4" sides and is about 30" long.
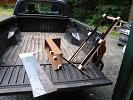
Before building the thing, I thought it prudent to create a mockup out of masonite in order to gauge sizes and angles. At right is the frame, at center is the chute, at left is some 1/8" thick steel plate that I'll cut & weld to make the chute. The frame will be made from 1.5" angle steel.
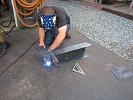
I did all the cutting, and here's my friend Scott welding the beginnings of the chute (he has a really nice MIG welder).
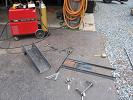
The chute and frame are taking shape...
Chute & frame complete, getting ready to build the hinge from the pieces resting in the pliers.
Done! The floor of the bunker slopes at a 17° angle and the chute matches that angle.
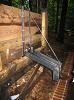
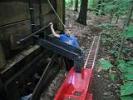
Here's the chute installed and lowered into "loading" position. The chain relieves some of the weight off the hinges. The horizontal thing above the hinge is the gate lever - lifting it opens the gate, which allows ballast to flow into the chute (see the movie).
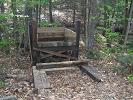
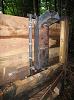
Here's the chute in the "up" position. When not in use, it's held up & out of the way so that trains can pass.
The chute with the ballast hopper positioned below it.
As usual, Jack was a HUGE help in installing the chute - he hold things & fetches tools and is an invaluable "third hand".
Being someone who loves to build things, it's a real joy to have a mechanically inclined kid who "gets it" and enjoys it as much as I do.
I got a half yard of pea gravel to see (a) how much the bunker can hold (answer: 2+ yards), and (b) to test the chute.
Click on the image below to view a movie of Jack filling the Hopper car with ballast. Even a 5 year old can do it (3.6MB WMV)
Using the chute and the hopper, Jack and I ballasted 30 feet of track in about 15 minutes (that's fast).
Jack would fill the hopper and push the car into place, then I'd open the hopper doors & we'd both move the car along slowly to dump the rock on the tracks.
After spreading the first load of ballast on the track, Jack had the quote of the day: "Hey, Dad - it really works!"
It really does work - better than I had expected :)